Mark Hofmeister
Welded Candle Holder
Client
Me
Location
Pittsburgh, PA
Year
2023
As explored in Abstract Work Alienates and Constrained Autonomy, an engineer should only dance in the most abstract peaks of thought to a rhythm set by the concrete. An incredible nail with which to ground oneself is the practice of welding.
I was lucky enough to learn various TIG welding techniques to morph and shape raw stainless steel into my creation. This process culminated in the creation of an open-faced box that was the first in the class's history to be completely water-tight, and which I turned into a candle.

First Passes

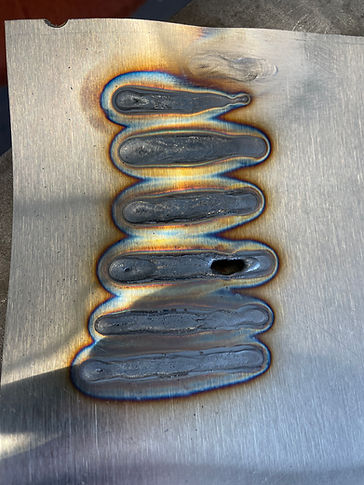
I began with stainless steel. With so many variables to contend with, one first simplifies down to mastering one or two dimensions. I began with electrode distance - It's remarkable just how close the electrode must get to the workpiece without touching. Maintaining the optimal distance requires absolute focus on the part of the operator, aligning all of the "focus vectors" in the brain toward this single goal. If you're a beginner, it also requires many extra electrodes to swap out with the ones that you've inevitably stuck to the workpiece time and time again.

Once I varied the electrode distance, I began to adjust the speed with which the electrode passes over the surface. This is evident in some passes barely breaking the surface and others blowing straight through.
It's remarkable just how much stainless steel warps. My practice piece was significantly warped after one column of passes. Further complicating the practice is the heat capacity of steel. The same piece of metal can behave very differently depending on the initial conditions - i.e., how hot it is. As one performs sequential welds on a workpiece, the metal hangs on to some of the heat, and each subsequent weld will respond differently based on this stored heat.
Filler Rod

I exercised the pedal's variability to the fullest extent when learning to use filler rod. I also gained a deeper understanding of the importance and power of "watching the puddle." I had to balance these new variables with the addition of filler rod, which reminds me much of soldering (but is much less forgiving.) It's remarkable, however, how successfully balancing all of these variables to produce a steady state of adding filler rod like a surfer on a wave of molten metal induces an unmatched state of psychological flow. I'm hooked.
Tacking + Seam Welds
"Tacks" are tiny little spot welds that join two workpieces with the tiniest bridge of metal. They're a great way to keep two otherwise unjoined pieces of metal in a desired configuration until a full weld can be applied, which is especially useful as a safeguard against warping. They're also remarkably strong - even two tacks can get the job done in some applications.


When performing a seam weld of any sort, the two materials to be joined must be absolutely flush with one another where the weld will be placed. Not even a piece of printer paper should fit in the space between them. This is incredibly difficult to pull off, especially when stainless steel warps considerably.
If two metal pieces are not completely flush, one can easily blow holes in his or her work. This penetrating force is provided by the shielding gas, which is paradoxically also the saving grace when it comes to preventing a material's corrosion.
One must also be careful when approaching corners of the material. The path for heat to dissipate narrows and it's very easy to completely blow off a corner, which requires one to ease off the power greatly.
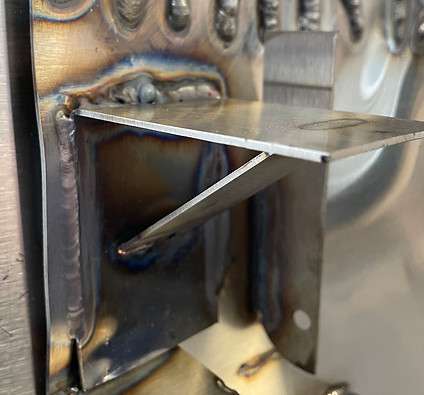
If these problems can be avoided, however, powerful skills emerge. The gusseted shelf to the right began only tack welded to the backing board. With just a few tacks, that tiny shelf supported the entirety of my bodyweight.

Final Box Project

Amassing all of my skills culminated in my final project - an open-faced box. Though it's a simple shape, constructing a box like this requires tacking, seam welding angle brackets, handling 3-dimensional corners, and using filler rod to fix the areas where you screw up.
Furthermore, one must cut material with enough overage for metal thickness, machine blade width, and the slight shrinkage that results from seam welds. It also introduced me to "bluing" the material, which is a blue "paint" that dries and allows one to scrape high-contrast cut lines and indicators into the material for ease of fabrication.
A further complication was the requirement to hold water. Though a weld might look completely air-tight, water will find the tiniest holes in your material and seep through ever-so-slowly, sometimes taking up to 5 minutes to do so. No one in the history of the welding class had ever created a water-tight box on their first try.
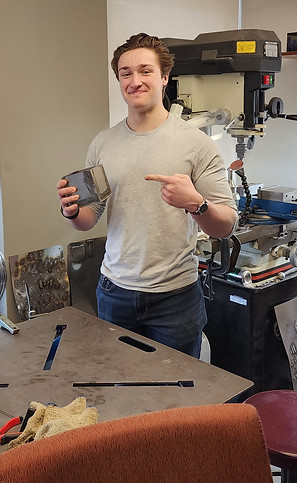
With this in mind, I built my box with utmost meticulousness. This paid off - my box held water on the first try, making me the first student in the class's history to achieve the elusive goal.


Had we more time and equipment in the class, I'd have welded a top on this box, drilled & threaded a hole in the top, and attached it to a pressurized gas injection system. I'd then see how much pressure the box can withstand as an indicator of my weld quality.
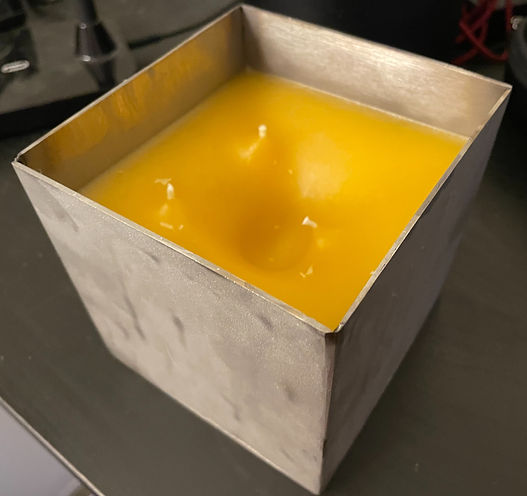
However, we don't have that equipment. I instead bead-blasted the box with glass beads to give a textured, frosty finish. I then filled it with 1.5 lbs. of beeswax and 3 candle wicks to produce a candle that will last for months.